
 By Jones Roberts
 From Idea to App Store: Developing Your First Shopify Plugin
In today’s e-commerce landscape, Shopify reigns as one of the most popular platforms for online stores. But no matter how versatile and powerful Shopify is, there’s always room for improvement or customization. That’s where plugins—apps that integrate seamlessly into Shopify stores—come in. Developing your first Shopify plugin might sound intimidating, but with the right approach, it can be a highly rewarding endeavor, both creatively and financially.
If you’ve ever spotted a gap in Shopify’s features or had an idea for improving store functionality, this guide will take you through each step—from concept to launch. Whether you’re a business looking for custom solutions or an aspiring developer ready to explore Shopify development services, creating your own plugin is the perfect way to contribute to the vibrant Shopify ecosystem.
1. Idea Generation and Research
The Spark of Inspiration
Every successful Shopify plugin starts with an idea—perhaps you’ve noticed a gap in Shopify’s existing functionality, or you’re inspired to enhance certain aspects of the merchant experience. Write down your ideas and evaluate them by asking these key questions:
- What specific problem does your plugin solve?
- Who is your primary audience—store owners, developers, or customers?
- How will your plugin enhance the Shopify experience, and is it scalable across different store sizes?
Defining these points early is crucial, as they’ll guide your development process, from features to marketing.
Market Research
Before diving into coding, research existing plugins in the Shopify App Store. This is a critical step for understanding market demand. Analyze the competition in terms of features, pricing models, and user reviews. Shopify development services can often assist at this stage to conduct thorough market research and provide valuable insights on current gaps and user needs.
Pro Tip: Stay up-to-date with Shopify’s API updates and roadmap. By anticipating upcoming platform changes, you can ensure your plugin remains relevant and functional in the long term.
2. Planning and Design

Wireframing
Start your planning by sketching the layout of your plugin, focusing on both the merchant-facing interface and customer-facing elements (if applicable). Tools like Figma or Sketch help create interactive prototypes, but you can start with basic wireframes. Shopify’s Polaris design system offers a great foundation for keeping your plugin visually consistent with Shopify’s admin dashboard.
Pro Tip: Freelance Shopify developers can be a great resource at this stage, offering expertise in creating user-friendly, functional designs that adhere to Shopify’s design guidelines while maintaining the unique identity of your app.
Define Features
Begin by outlining the core features your plugin will offer. Simplicity is key in the early stages—try to solve a single pain point effectively. You can always expand with additional features after launch.
Pro Tip: Focus on modularity and flexibility. Allow merchants to customize your plugin to their specific needs, which will broaden your app’s appeal.
Choose a Technology Stack
Selecting the right technology stack is crucial for both development and long-term maintenance:
- Frontend: React and Shopify’s Polaris framework make for an excellent combination when designing user interfaces. Vue.js is another option for developers preferring a different structure.
- Backend: Shopify supports several backend frameworks, but Node.js and Ruby on Rails are the most commonly used.
- GraphQL API: While Shopify also provides a REST API, GraphQL is generally more efficient, especially when dealing with large datasets.
Pro Tip: Consider API rate limits and data scalability from the start. High-traffic stores with large amounts of data can put a strain on your app if you don’t manage API requests efficiently.
3. Development
Set Up Your Development Environment
To begin developing your plugin, set up the necessary tools:
- Node.js: Required for backend development.
- npm/yarn: For managing dependencies.
- Shopify CLI: A vital tool for scaffolding and testing your app.
- Tunnel Setup: Use tools like Ngrok to expose your local environment to Shopify during development.
Pro Tip: Use Shopify’s development stores for testing. These stores mimic real-world scenarios without impacting live customer environments.
Scaffold Your Project
Shopify CLI simplifies the setup process by scaffolding your project and creating the necessary files. From there, focus on building the core functionality, ensuring clean and modular code.
Build the UI
Your plugin’s frontend should be built using React along with Shopify’s Polaris components to maintain consistency. Keep the UI intuitive and mobile-responsive, as many merchants manage their stores on the go.
Pro Tip: If you’re handling sensitive data like customer details, prioritize security with encryption and follow Shopify’s strict data privacy guidelines.
Implement Backend Logic
The backend is where your plugin communicates with Shopify’s APIs. OAuth authentication, handling data retrieval, and executing custom logic form the core of the backend. If your app stores or processes data externally, consider reliable storage options like AWS or Firebase.
Pro Tip: Make use of queuing systems for bulk operations. This is particularly important if your plugin will handle bulk data updates or syncs across large stores.
Test, Test, Test
Thorough testing across various scenarios is critical. Use Shopify’s development stores to test API integration, performance, and app behavior in different merchant environments. Automated tests for frontend and backend components ensure that everything functions smoothly.
Pro Tip: Hire Shopify developers experienced in quality assurance to ensure your plugin works in real-world settings, across different Shopify themes, and under heavy usage loads.

4. Submission and Launch
Create a Partner Account
To list your plugin in the Shopify App Store, you’ll need a Shopify Partner account. This also gives you access to valuable tools like the Partner Dashboard for app management and tracking.
Create Your App Listing
Your app listing is your product’s storefront within the App Store. Make sure to craft a compelling description that clearly outlines your plugin’s benefits and use high-quality visuals, including screenshots and demo videos.
Pro Tip: Focus your description on the problems your app solves. Merchants need to quickly understand why they should install your plugin and how it adds value to their store.
Submit for Review
Before submitting your plugin, thoroughly review Shopify’s App Store guidelines. Shopify’s review process ensures compliance with their standards and usually takes a few days to a week, depending on the complexity of your plugin.
Pro Tip: Preemptively address common causes of rejection such as unclear functionality, poor UX design, or improper API usage.
Launch Day!
Once your plugin is approved, it’s time to launch! Promote your app through Shopify forums, your social media channels, and targeted email campaigns. If you offer early adopters a limited-time discount, it can help boost downloads and reviews.
Pro Tip: Use analytics tools to monitor user behavior and understand how merchants interact with your plugin. This data will help inform future updates and improvements.
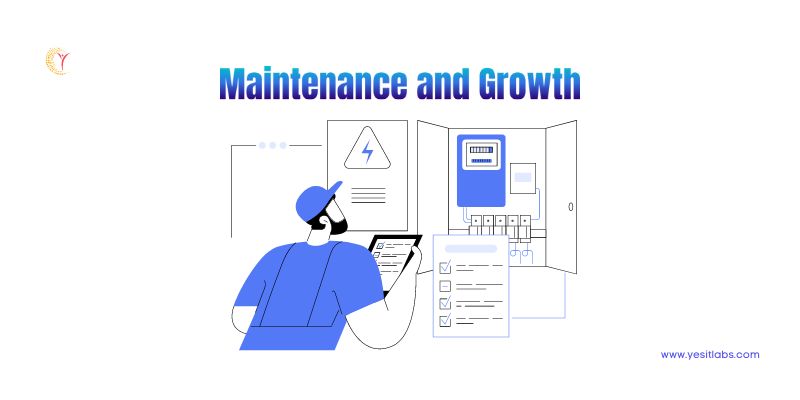
5. Maintenance and Growth
Listen to Feedback
After launch, continuously monitor user feedback and reviews. Fix bugs quickly and listen to feature requests—this will help shape your roadmap for future updates.
Pro Tip: Consider incorporating a built-in feedback mechanism directly within the app. This allows you to gather feedback early and helps avoid negative reviews on the App Store.
Stay Updated
Shopify frequently updates its platform, and staying ahead of these changes is vital to ensuring that your plugin remains functional and secure.
Pro Tip: Subscribe to Shopify’s developer newsletters and attend Shopify Unite events to stay updated on platform changes and new opportunities for developers.
Marketing
Don’t rely solely on organic discovery through the App Store. Actively market your app through content marketing, affiliate partnerships, and by engaging with Shopify Experts. You can also offer free trials or freemium versions to increase adoption.
Pro Tip: Forge connections within the Shopify ecosystem. Building relationships with Shopify Experts, other app developers, and even merchants will help your app gain visibility and credibility.
Building your first Shopify plugin is just the beginning of an exciting journey. From initial concept to app store success, each stage requires careful thought, execution, and iteration. However, the true value of your plugin will be measured by its ability to evolve alongside Shopify’s platform and meet the growing needs of merchants.
Estimated Cost to Develop a Shopify Plugin
The cost of developing a Shopify plugin depends on various factors such as complexity, the development team, and feature set. Here’s a breakdown:
Development Team and Expertise
- Freelance Shopify Developers: A cost-effective option with rates between $30–$150/hour.
- Average Project Cost: $3,000 to $20,000.
- Shopify Development Agencies: Agencies usually charge more but offer complete services, including project management, testing, and support.
- Cost: $10,000–$50,000+ depending on the complexity.
 Factors Influencing Cost
- App Complexity:
- Basic Plugin: $3,000–$10,000.
- Intermediate Plugin: $10,000–$30,000.
- Advanced Plugin: $30,000–$50,000+.
- Ongoing Costs: Maintenance, updates, and customer support are recurring costs:
- Monthly Maintenance: $500–$2,000.
- Support: $1,000–$5,000 annually.
- Marketing: Promoting your plugin is essential for gaining users.
- Marketing Budget: $1,000–$5,000+.
To stand out, focus on solving real-world problems, maintaining strong performance, and responding to user feedback. Remember, the most successful plugins aren’t necessarily the most complex—they’re the ones that provide clear, measurable value to their users.
With persistence and strategic marketing, your app can become a valuable tool in the Shopify ecosystem, turning your idea into a thriving business that benefits merchants worldwide.
Tags: Best Shopify development company, freelance shopify developer, freelance shopify developers, hire dedicated shopify developers, hire Shopify developer, hire Shopify developers, shopify developer, shopify developers for hire, Shopify development company, Shopify development company in USA, shopify development service, Shopify development services, Shopify Plugin, Shopify Plugin development, Shopify Plugin development company, Shopify Plugin development services, shopify website developer, shopify website development company, shopify website development servicesLatest Resources

Top Frameworks for Cross-Platform App Development in 2025
January 22, 2025

A Guide to Types of Artificial Intelligence (AI)
January 14, 2025

Key Benefits of React Native App Development
January 7, 2025

Leveraging AI in Startup Software Development: Trends and Tips
December 30, 2024

Mobile Optimization for Shopify Apps: Best Practices
December 23, 2024


